Ah, so you want to build electronics, yes? Very good! Like building with tiny Lego bricks, but with electricity! Very precise, very satisfying when all the blinking lights work, ah yes.
Highlight
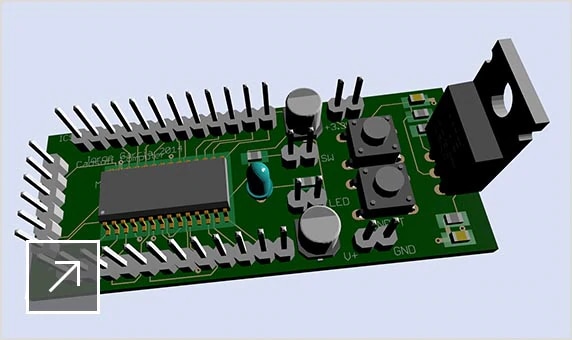
Free Online Eagle PCB Library: Footprints & Layouts | Ultra Librarian: Simplify Your Design Process! Pcb library for eagle
Ah, so you want to build electronics, yes? Very good! Like building with tiny Lego bricks, but with electricity! Very precise, very satisfyi...
Wednesday, May 21, 2025
Tuesday, May 20, 2025
High Power LA4440 Double IC Stereo Audio Amplifier with Bass and Treble Control: DIY Guide! Amplifier ic stereo audio double circuit treble bass control power high working
Ah, you want make big sound system for your karaoke, eh? No problem! We got you covered! These amplifier projects, they really pack a punch! We talk about stereo, bass, treble – all the good stuff. Get ready to sing your heart out!
Monday, May 19, 2025
John Deere 322 Wiring: Tractor Electrical Fixes! [diagram] john deere 322 lawn tractor wiring diagram
Ever wrestled with the wiring on your John Deere and felt like you're staring into a bowl of spaghetti? Don't worry, you're not alone! Electrical gremlins can be a real pain, especially when they're keeping you from enjoying your perfectly manicured lawn or tackling those tough garden chores. Understanding your tractor's wiring diagram is essential for troubleshooting electrical issues, performing maintenance, and even adding aftermarket accessories.
HP Pavilion Wiring Diagram – Laptop Repair Made Easy! Schematic diagram hp pavilion laptop
Oh, the glorious world of laptop repair! It's a land of tiny screws, questionable soldering, and the ever-present fear of releasing the Magic Smoke. You know, the stuff that makes electronics work until you let it out. Then, suddenly, it's just a paperweight... a really expensive, complicated paperweight. And what guides us through this minefield of circuits and resistors? Schematics, of course! These aren't your grandma's knitting patterns; these are the blueprints of digital life, a chaotic yet strangely beautiful roadmap to understanding what makes our precious devices tick.
LED Clock Using 555 and 4017 (No Programming Needed): DIY Guide for Beginners! A man holding up a drink in front of a clock with arabic writing on it
The realm of electronics offers countless opportunities for innovation and creative application. Among the fundamental and widely used circuits are LED chasers, which provide a visually appealing and dynamically changing display. These circuits, often built around the reliable IC 4017 decade counter and the versatile IC 555 timer, demonstrate basic principles of digital and analog electronics. Let's delve into a couple of examples of such circuits.
Sunday, May 18, 2025
DALI Wiring Diagram: The Ultimate Comprehensive Guide! Detailed wiring diagram for dali lighting control system
Alright, check it, fam. We're gonna break down this DALI LED driver situation. Straight up, understanding how to wire this thing ain't always the easiest thing to wrap your head around, but we gonna get through it together. This ain't no rocket science, just good ol' fashioned electrical know-how. Let's get this bread, y'all!
Look, the whole point of a DALI (Digital Addressable Lighting Interface) system is to give you *control*. Real, serious control over your lighting. Think about it: dimming lights precisely, setting scenes, and even monitoring the whole system for problems. No more just flicking a switch and hoping for the best. This is about getting *specific* with your illumination. And that all starts with understanding how to hook everything up right. So, pay attention, and let's dive in.
Apple iPhone 5 Disassembly Motherboard Schematic Diagram: Service Ways IC Solution Update! Apple iphone x disassembly motherboard schematic diagram service ways
Analyzing intricate electronic systems requires a deep understanding of component placement and interconnections. Disassembly and schematic diagrams are invaluable tools for technicians and engineers working with sophisticated devices such as modern smartphones.
Friday, May 16, 2025
SKEMA DRIVER MCRD V3 346: Build a High-Performance Audio System! Skema driver ampli mcrd v4 by sukyz – artofit
Hey everyone! Been tinkering around with some electronics projects lately, and stumbled upon some interesting resources I wanted to share. I've always been fascinated by PCB design and the inner workings of audio amplifiers. Found a couple of things that really piqued my interest and thought you might find them cool too.
Thursday, May 15, 2025
2002 Chevy Malibu Wiring Diagram: Fix Your Car’s Electrical Issues
If you're experiencing electrical issues with your 2002 Chevy Malibu, understanding the wiring diagram can be a game-changer. Whether it's flickering lights, malfunctioning power windows, or a stubborn ignition system, having a clear visual reference can help you diagnose and fix problems more efficiently. In this blog post, we'll delve into the intricacies of the 2002 Chevy Malibu wiring diagram, providing you with valuable insights and step-by-step guidance to tackle your car's electrical challenges. Say goodbye to frustration and hello to a well-functioning vehicle!
Chevy Malibu Ignition Switch
When tackling electrical issues in your 2002 Chevy Malibu, understanding the ignition switch is crucial. The ignition switch is a key component in the vehicle's electrical system, responsible for controlling the flow of electricity to various systems, including the starter and ignition coils. If you're experiencing problems such as the engine not starting, flickering dashboard lights, or intermittent electrical failures, the ignition switch could be the culprit. In our comprehensive wiring diagram, we'll guide you through the connections and potential troubleshooting steps to ensure your Malibu runs smoothly. By addressing ignition switch issues early, you can prevent further complications and keep your vehicle in top shape.
 www.tankbig.com
 2001 Chevy Malibu Radio Wiring Diagram
When tackling electrical issues in your 2001 Chevy Malibu, understanding the radio wiring diagram is crucial for troubleshooting and repairs. This diagram provides a detailed layout of the various connections and color codes for the radio, helping you identify the power source, ground, and speaker wires. Whether you're upgrading your sound system or simply trying to fix a malfunctioning radio, having access to the correct wiring information can save you time and prevent potential damage. In our comprehensive guide on the 2002 Chevy Malibu wiring diagram, we'll delve deeper into the specifics of the radio wiring for the 2001 model, ensuring you have all the resources you need to effectively address your car's electrical challenges.
 www.chanish.org
 2000 Chevy Malibu Wiring Diagram
When tackling electrical issues in your 2002 Chevy Malibu, a comprehensive understanding of the wiring diagram is essential. The 2000 Chevy Malibu wiring diagram serves as a valuable reference, providing detailed schematics that illustrate the vehicle's electrical system layout. This diagram includes crucial information about the location of various components, such as the battery, fuses, and relays, helping you diagnose problems efficiently. By following the wiring diagram, you can trace circuits, identify faulty connections, and ensure that all electrical components are functioning correctly. Whether you're a seasoned mechanic or a DIY enthusiast, having access to the right wiring diagram will empower you to fix your car's electrical issues with confidence and precision.
 wiringschems.blogspot.com
 [diagram] 1979 Malibu Classic Wiring Diagrams
When tackling electrical issues in your 2002 Chevy Malibu, understanding the wiring diagrams from earlier models, like the 1979 Malibu Classic, can provide valuable insights. While the systems have evolved, the foundational principles of automotive wiring remain consistent. The 1979 Malibu Classic wiring diagrams offer a glimpse into the basic electrical layout, showcasing how components like the battery, ignition, and lighting systems are interconnected. By comparing these diagrams to your 2002 model, you can better grasp the wiring logic and troubleshoot problems more effectively. Whether you're dealing with a malfunctioning headlight or a dead battery, having a solid understanding of these wiring diagrams can empower you to fix your car's electrical issues with confidence.
![[diagram] 1979 malibu classic wiring diagrams](https://i0.wp.com/www.hb9thj.ch/oldtimer/Chevrolet-Malibu-Classic/Chevrolet-1979-Malibu-Classic-Wiring-Diagrams/slides/Chevrolet-1979-Malibu-Classic-Wiring-Diagrams-06.jpg) mydiagram.online
mydiagram.online 2010 Chevy Malibu Wiring Schematic
When tackling electrical issues in your 2010 Chevy Malibu, having a reliable wiring schematic is essential for effective troubleshooting and repairs. The wiring diagram provides a detailed layout of the vehicle's electrical system, showcasing the connections between various components such as the battery, alternator, fuses, and sensors. Understanding this schematic can help you identify potential short circuits, faulty connections, or component failures that may be causing your electrical problems. Whether you're a seasoned mechanic or a DIY enthusiast, referring to the 2010 Chevy Malibu wiring schematic will empower you to diagnose and fix your car's electrical issues with confidence, ensuring a smoother and safer driving experience.
 resolutionsforyou.com
 Other Wiring Gallery

www.chevywiringdiagram.com
2009 Chevy Malibu Wiring Schematic Wiring Diagram Schemas

eleccircs.com
How To Install A Stereo In A 2011 Chevy Malibu: Wiring Diagram And Step

kdi-ppi.com
The Complete Guide To Understanding The 2017 Chevy Malibu Wiring Diagram
mydiagram.online
[diagram] 1979 Malibu Classic Wiring Diagrams
wiringschems.blogspot.com
2000 Chevy Malibu Wiring Diagram
www.tankbig.com
Chevy Malibu Ignition Switch

wiredraw.co
2012 Chevy Malibu Wiring Diagram

eleccircs.com
You Might Also Like: Crown Xls 5000 Schematic Diagram Inside
How To Install A Stereo In A 2011 Chevy Malibu: Wiring Diagram And Step
Tuesday, May 13, 2025
Wise Mind Venn Diagram: Master Your Emotional Balance!
In today's fast-paced world, finding emotional balance can often feel like an uphill battle. Enter the Wise Mind Venn Diagram, a powerful tool designed to help you navigate the complex interplay between your rational thoughts and emotional responses. By visualizing the intersection of these two crucial aspects of your mind, you can gain deeper insights into your decision-making processes and enhance your emotional well-being. In this blog post, we'll explore how the Wise Mind Venn Diagram can empower you to master your emotional balance, leading to healthier relationships, improved mental health, and a more fulfilling life.
Wise Mind Dbt Printable Worksheet
The Wise Mind DBT printable worksheet is an invaluable tool for anyone looking to enhance their emotional balance through the principles of Dialectical Behavior Therapy (DBT). This worksheet features the Wise Mind Venn Diagram, which visually represents the interplay between our emotional mind and rational mind, guiding users to find their "Wise Mind"—a state of balanced decision-making. By engaging with this printable resource, individuals can effectively identify their feelings, thoughts, and behaviors, fostering greater self-awareness and promoting healthier coping strategies. Whether you're a seasoned DBT practitioner or just starting your journey, this worksheet serves as a practical aid in mastering emotional regulation and achieving a harmonious state of mind.
 www.myxxgirl.com
 Dbt Mindfulness Venn Diagram Dbt Skills
In the realm of Dialectical Behavior Therapy (DBT), the Wise Mind Venn Diagram serves as a powerful tool for mastering emotional balance. This diagram illustrates the intersection of two essential states of mind: the Rational Mind, which is grounded in logic and facts, and the Emotional Mind, driven by feelings and instincts. At the heart of this diagram lies the Wise Mind, where both rationality and emotion harmoniously coexist, enabling individuals to make balanced decisions. By utilizing DBT skills such as mindfulness, distress tolerance, and interpersonal effectiveness, you can cultivate this Wise Mind state, allowing you to navigate life's challenges with greater clarity and emotional resilience. Embracing the insights from the Venn Diagram not only enhances self-awareness but also empowers you to respond to situations with a blend of reason and empathy, ultimately fostering a more fulfilling and balanced life.
 schematicmagesquida4.z21.web.core.windows.net
 Understanding The Connection Between Dbt Wise Mind And Venn Diagrams
In the realm of Dialectical Behavior Therapy (DBT), the concept of Wise Mind serves as a crucial tool for achieving emotional balance, and Venn diagrams provide a visual representation of this intricate relationship. Wise Mind embodies the synthesis of two distinct states of mind: the emotional mind, which is driven by feelings and impulses, and the rational mind, which relies on logic and facts. By utilizing a Venn diagram, individuals can effectively illustrate how these two aspects overlap to form Wise Mind, where emotions and reason coexist harmoniously. This intersection not only helps in recognizing the importance of both emotional and rational thought processes but also empowers individuals to navigate challenging situations with greater clarity and composure. Understanding this connection can lead to improved decision-making and a more balanced emotional state, ultimately enhancing one's overall well-being.
 techschems.com
 Free Printable Wise Mind Worksheet Collection For All Ages
In our fast-paced world, maintaining emotional balance can be a challenge for individuals of all ages. That's why we're excited to introduce our Free Printable Wise Mind Worksheet Collection! This resource is designed to help you explore the concept of the Wise Mind, a crucial element in achieving emotional regulation and mindfulness. Our worksheets, suitable for children, teens, and adults, feature engaging activities and the classic Venn Diagram format that encourages self-reflection and insight. Whether you're seeking to enhance your emotional intelligence, improve decision-making, or simply find a moment of calm, these printables provide a practical and accessible way to master your emotional balance. Download your collection today and start your journey towards a more centered and mindful life!
 worksheetzone.org
 Dbt Skills: Wise Mind
In the realm of Dialectical Behavior Therapy (DBT), the concept of "Wise Mind" serves as a crucial tool for achieving emotional balance and effective decision-making. The Wise Mind is often illustrated through a Venn diagram, where the two circles represent the rational mind and the emotional mind. When these two aspects intersect, you find the Wise Mind—a state of awareness that combines logic with emotion, allowing for a more comprehensive understanding of situations. By tapping into your Wise Mind, you can navigate life's challenges with greater clarity and resilience, making choices that honor both your feelings and your rational thoughts. This balance not only enhances personal well-being but also fosters healthier relationships and improved problem-solving skills. Embracing the Wise Mind can ultimately empower you to master your emotional landscape and lead a more fulfilling life.
 bpd-aware.com
 Other Wiring Gallery

medium.com
Wise Mind: States Of Mind. This Handout From Dbt Skills Training…

enginelibkalb.z19.web.core.windows.net
Wise Mind Venn Diagram

signalwires.com
The Art Of Balancing Logic And Emotion: Wise Mind Venn Diagram

www.etsy.com
Wise Mind Dbt Skill Handouts

signalwires.com
The Art Of Balancing Logic And Emotion: Wise Mind Venn Diagram

www.dreamstime.com
Heart And Mind Venn Diagram Logic Vs Emotion Stock Illustration

worksheets.clipart-library.com
Dbt Mindfulness: Wise Mind Worksheet
Monday, May 12, 2025
Keyence SR-1000 Wiring Diagram: Simplify Your Sensor Setup
Setting up sensors can often feel like a daunting task, especially when it comes to deciphering complex wiring diagrams. However, with the Keyence SR-1000 wiring diagram, you can simplify the entire process and streamline your sensor configuration. This powerful tool not only enhances your understanding of the SR-1000's capabilities but also ensures that your sensor setup is efficient and error-free. In this blog post, we'll explore the intricacies of the Keyence SR-1000 wiring diagram, offering tips and insights to help you navigate your sensor installations with confidence and ease. Whether you're a seasoned technician or a DIY enthusiast, this guide will provide you with the knowledge you need to optimize your sensor setup.
Keyence Sr 1000 Wiring Diagram
When setting up the Keyence SR-1000 sensor, understanding the wiring diagram is crucial for ensuring a seamless installation process. The Keyence SR-1000 wiring diagram provides a clear visual representation of how to connect the sensor to your system, detailing the necessary terminals and wire configurations. By following this diagram, you can simplify your sensor setup, minimizing the risk of errors and optimizing performance. Whether you're integrating the SR-1000 into a new project or retrofitting it into an existing system, having a comprehensive understanding of the wiring layout will help you achieve reliable and efficient operation. In this blog post, we'll delve deeper into the specifics of the wiring diagram and offer tips to make your installation process as smooth as possible.
 illustrationkeaney10.blogspot.com
 Barcode Reader Sr-1000 Keyence Huge Inventory
In the world of industrial automation, the Keyence SR-1000 barcode reader stands out for its exceptional performance and versatility, particularly when managing huge inventories. Designed to streamline inventory processes, the SR-1000 offers high-speed scanning and reliable data capture, making it an invaluable tool for warehouses and distribution centers. Its advanced features, such as multiple reading modes and easy integration with existing systems, simplify the sensor setup, allowing businesses to optimize their operations effortlessly. Whether you're tracking products on the floor or managing extensive stock levels, understanding the wiring diagram of the Keyence SR-1000 can enhance your setup, ensuring you maximize the efficiency of your barcode reading capabilities.
 cdntb.edu.vn
 ️keyence Sr 1000 Wiring Diagram Free Download Gambr.co
You Might Also Like: N14 Celect Ecm Wiring Diagram Master
If you're looking to streamline your sensor setup, the Keyence SR-1000 wiring diagram available for free download at gambr.co is an invaluable resource. This comprehensive diagram provides clear and detailed instructions, making it easier for users to connect their sensors accurately and efficiently. Whether you're a seasoned technician or a DIY enthusiast, having access to this wiring diagram can significantly reduce installation time and minimize errors. With the Keyence SR-1000's advanced features and the clarity offered by the wiring diagram, you can ensure optimal performance for your automation projects. Don't miss out on this essential tool to simplify your sensor setup!
Sunday, May 11, 2025
Magnetic Door Lock Wiring Diagram: Secure Your Property Today!
Are you looking to enhance the security of your property? A magnetic door lock could be the perfect solution for you! In this blog post, we'll explore the ins and outs of magnetic door lock wiring diagrams, providing you with the essential knowledge to install and maintain this effective security system. Whether you're a DIY enthusiast or a professional installer, understanding the wiring process is crucial for ensuring your magnetic locks function flawlessly. Let's dive into the details and empower you to secure your property today!
Magnetic Door Lock Wiring Diagram
When it comes to enhancing the security of your property, understanding the magnetic door lock wiring diagram is essential. This diagram provides a clear visual representation of how to connect the various components of a magnetic lock system, ensuring that you can install it correctly and efficiently. Typically, the diagram will illustrate the connections between the magnetic lock, power supply, and control switch, allowing you to see how each part interacts to create a reliable locking mechanism. By following the wiring diagram closely, you can ensure that your magnetic door lock operates smoothly, providing you with peace of mind and an added layer of security for your home or business. Whether you're a DIY enthusiast or a professional installer, mastering the wiring diagram is the first step towards securing your property today!
 stewart-switch.com
 A Complete Guide To Elock Magnetic Lock Wiring Diagrams
In our comprehensive guide to elock magnetic lock wiring diagrams, we aim to provide you with all the essential information needed to secure your property effectively. Magnetic door locks are a popular choice for enhancing security, and understanding their wiring is crucial for proper installation and functionality. This guide will walk you through the different types of elock systems, including their components and how they interact with your existing security setup. Whether you're a DIY enthusiast or a professional installer, our detailed diagrams and step-by-step instructions will ensure you have a clear understanding of how to wire your magnetic locks correctly, enabling you to safeguard your property with confidence.
 techschematic.com
 Elock Magnetic Lock Wiring Diagram
When it comes to enhancing the security of your property, understanding the Elock magnetic lock wiring diagram is essential. This diagram provides a clear visual representation of how to properly connect the various components of the magnetic lock system, ensuring optimal functionality and safety. Typically, the wiring involves linking the power supply to the electromagnetic lock, connecting the control panel, and integrating any additional security features like access control systems or motion sensors. By following the Elock magnetic lock wiring diagram, you can ensure a seamless installation process, ultimately providing peace of mind knowing your property is well-secured. Whether you're a DIY enthusiast or a professional installer, having a detailed wiring diagram at your fingertips is crucial for a successful setup.
 www.circuitdiagram.co
 Magnetic Door Lock Schematic Diagram
A magnetic door lock schematic diagram is an essential tool for anyone looking to enhance their property's security. This diagram visually represents how the components of a magnetic lock system are interconnected, providing a clear overview of the wiring and electrical connections needed for installation. Typically, it includes details about the power supply, control switches, and the lock itself, making it easier for both DIY enthusiasts and professional installers to understand the setup. By following this schematic, you can ensure that your magnetic door lock operates efficiently, offering a reliable barrier against unauthorized access while maintaining the convenience of keyless entry. Understanding this diagram is the first step toward securing your property effectively today!
 www.wiringdraw.com
 24v Magnetic Door Lock Wiring Diagram
When it comes to securing your property, understanding the wiring diagram for a 24V magnetic door lock is essential. This type of lock operates using electromagnetic force, which means it requires a reliable power source to function effectively. In a typical wiring diagram, you'll find connections for the power supply, the locking mechanism, and any control devices, such as push buttons or access control systems. Properly wiring a 24V magnetic door lock ensures that the lock engages and disengages as intended, providing peace of mind and enhanced security for your home or business. By following the wiring diagram carefully, you can ensure a seamless installation that protects your property from unauthorized access.
 stewart-switch.com
 Other Wiring Gallery
www.circuitdiagram.co
Elock Magnetic Lock Wiring Diagram

diagramwallsoverswims.z13.web.core.windows.net
Magnetic Door Lock Wiring Diagram Pdf

signalwires.com
Wiring Diagram For Magnetic Door Contacts Explained

toplocksecurity.com
You Might Also Like: 2011 Subaru Outback Wiring Diagram Fix
Wiring Diagram For Magnetic Door Lock
Friday, May 9, 2025
3 Prong 220 Plug Wiring Diagram: Master Your High-Voltage Setup!
Are you ready to tackle your high-voltage electrical projects with confidence? Understanding the intricacies of a 3 prong 220 plug wiring diagram is essential for anyone looking to safely and effectively manage their electrical setups. Whether you're powering heavy-duty appliances, setting up a workshop, or working on a DIY project, mastering the wiring of a 220 plug can make all the difference. In this blog post, we'll break down the components, provide a clear wiring diagram, and offer tips to ensure your installation is both safe and efficient. Let's dive into the world of high-voltage wiring and empower you to master your electrical projects!
220 Volt Dryer Outlet Wiring Diagram 3 Plug
When it comes to setting up your 220-volt dryer outlet, understanding the wiring diagram for a 3-prong plug is crucial for ensuring safety and functionality. A typical 3-prong 220-volt dryer outlet features three connections: two hot wires, which carry the current, and one neutral wire, which serves as a return path. In the wiring diagram, you'll notice that the two hot wires are usually color-coded in black and red, while the neutral wire is typically white. This configuration allows for a total of 240 volts, providing the necessary power to run your dryer efficiently. Properly wiring your outlet not only maximizes performance but also minimizes the risk of electrical hazards, making it essential for DIY enthusiasts and homeowners alike to master this high-voltage setup.
 wiringlibraryburton.z13.web.core.windows.net
 220v Plug Wiring Diagram
When it comes to setting up a 220V electrical system, understanding the wiring diagram for a 3-prong 220 plug is essential for both safety and functionality. A typical 220V plug features three prongs: two hot wires and one ground wire. The hot wires, usually colored black and red, carry the electrical current, while the green or bare wire serves as the ground for safety. In a standard wiring diagram, you'll find that the two hot wires connect to the corresponding terminals on the plug, while the ground wire connects to a designated terminal, ensuring a secure and efficient connection. Mastering this wiring diagram not only empowers you to handle high-voltage setups confidently but also helps prevent potential hazards associated with improper wiring. Whether you're installing a new appliance or upgrading your electrical system, knowing how to wire a 3-prong 220 plug is a crucial skill for any DIY enthusiast or homeowner.
 www.tankbig.com
 3 Prong Electrical Plug Wiring
When it comes to wiring a 3 prong 220 plug, understanding the configuration is crucial for both safety and functionality. A typical 3 prong plug includes a hot wire, a neutral wire, and a ground wire, each serving a specific purpose in your high-voltage setup. The hot wire, usually colored black or red, carries the electrical current, while the neutral wire, often white, provides a return path for the current. The ground wire, typically green or bare, acts as a safety measure to prevent electrical shock by directing excess current away from the device and into the ground. When wiring your 3 prong 220 plug, it's essential to follow the correct wiring diagram to ensure that each wire is connected properly, minimizing the risk of short circuits or electrical fires. Mastering this wiring process not only enhances your electrical project's safety but also ensures optimal performance for your high-voltage appliances.
 stewart-switch.com
 Understanding 220 Volt Stove Wiring: A Simple Diagram
Understanding 220 volt stove wiring is essential for anyone looking to safely and effectively connect their high-voltage appliances. A simple wiring diagram can demystify the process, highlighting the crucial components involved in a 3-prong 220 plug setup. Typically, this configuration includes two hot wires, which carry the current, and a ground wire for safety. By following a clear diagram, you can ensure that your stove is wired correctly, minimizing the risk of electrical hazards while maximizing performance. Whether you're a DIY enthusiast or a seasoned electrician, mastering this wiring can empower you to tackle your kitchen installations with confidence.
 allwiringsketch.com
 Three Prong 220 Volt Plug
When it comes to setting up high-voltage appliances, understanding the three prong 220 volt plug is essential for both safety and performance. This type of plug is designed to handle the higher amperage required by heavy-duty devices, such as dryers, ovens, and air conditioners, ensuring a stable and efficient power supply. The three prongs consist of two hot wires and one ground wire, which work together to provide a balanced electrical load while minimizing the risk of electrical shock. In this blog post, we'll delve into the intricacies of the 3 prong 220 plug wiring diagram, guiding you through the installation process and helping you master your high-voltage setup with confidence.
 diagramdatachartres.z4.web.core.windows.net
 Other Wiring Gallery

elecsprout.com
Wiring Diagram For 3-prong 220 Volt Plug

diagramio.com
Understanding European 220v Plug Wiring

manualpentathlon.z14.web.core.windows.net
220 Dryer Plug Wiring Diagram 4 Wire

wiringmaster.com
Understanding 220 Wiring: A Simple 3-wire Diagram
www.tankbig.com
220v Plug Wiring Diagram

doknit.blogspot.com
Dryer Outlet Wiring Diagram 3 Prong

moowiring.com
Understanding The Wiring Diagram Of A 3-prong 240v Plug
wiringlibraryburton.z13.web.core.windows.net
You Might Also Like: Ford 40L Engine Diagram Workhorses
220 Volt Dryer Outlet Wiring Diagram 3 Plug
Subscribe to:
Comments (Atom)